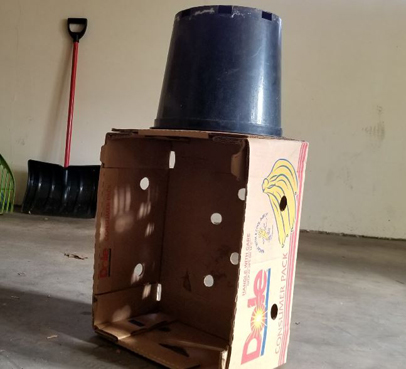
Bucket on top of box n a garage
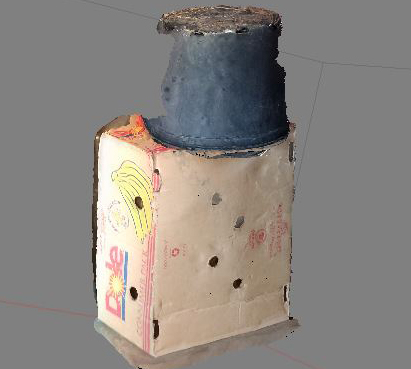
... and in PhotoScan
Structure from Motion (SfM): Producing 3D Content from Photographs
|
|
Bucket on top of box n a garage |
... and in PhotoScan |
Goal
To build a 3D textured model from a series of still images that can be imported as points (.las) into ArcMap
Onto your personal computer / laptop, download a 30-day free trial of PhotoScan software
Note
11/25/2018: This tutorial was stitched together from a handful of tutorials produced by Agisoft and from independent researchers Brittany Johnson and Stacy H. Recognize that I too am a beginner with this software and this process.
Workflow
1) Take a bunch of pictures of an object
Take a bunch (25?) of photos of an object with any digital camera (phone, point and shoot, etc.). High resolution, sharply focused photos work best. Walk around the object taking heavily overlapping photos from all sides, the top, etc. It's best to avoid strong shadows and shiny, smooth, reflective surfaces. The object must be at rest. Saving to .jpg format is good but other file formats work too.
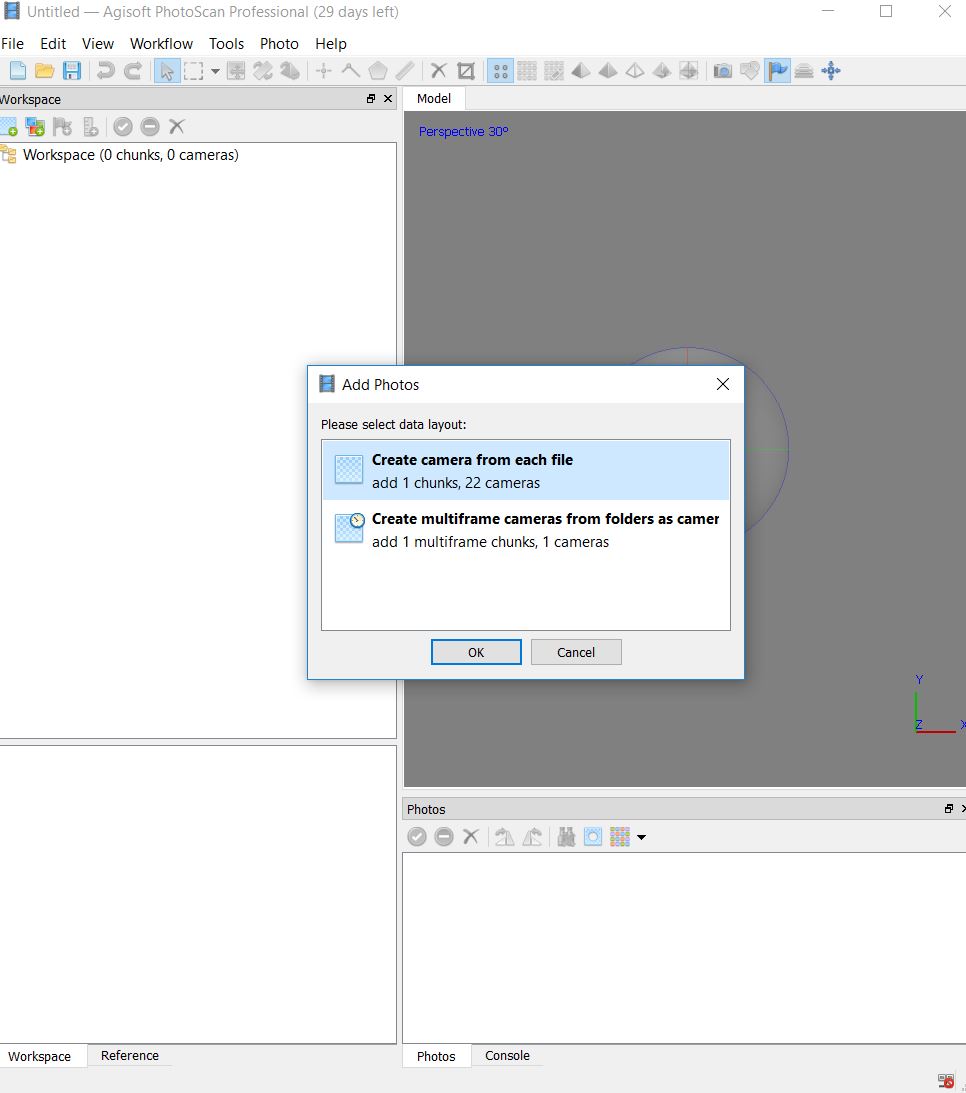
2) Add photos, delete bad ones
Open PhotoScan. Add photos by selecting the folder in which they are stored locally: 'Workflow' > 'Add Folder.' Select ‘Create camera from each file.’ PhotoScan refers to your photos as ‘cameras’ and your project as a ‘chunk’
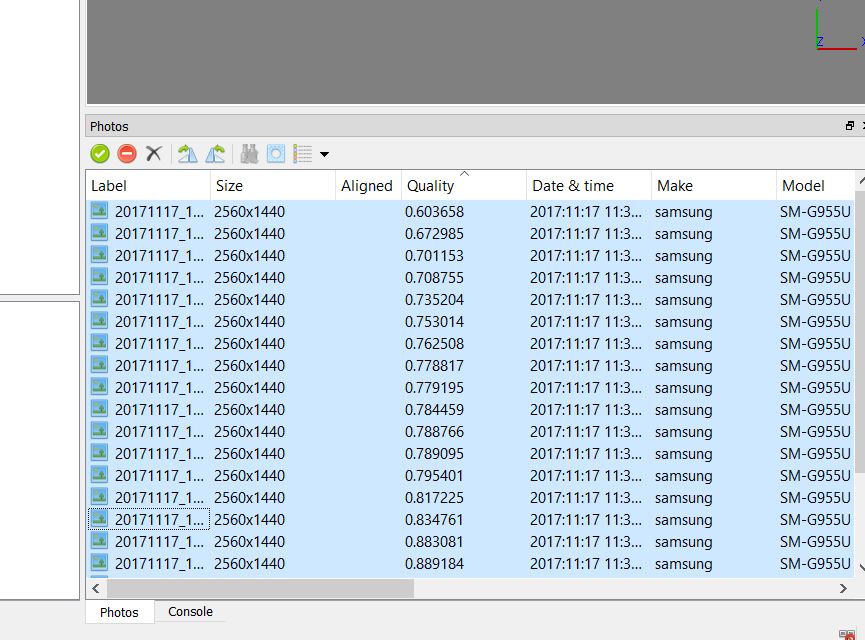
Manually delete images that are blurry or obstructed. Do this by hitting ‘delete’ or click the delete icon (x) in PhotoScan. PhotoScan too can help identify photos that might be bad. The tool is called ‘Estimate Image Quality.’ Select all of your photos, right-click, and select ‘Estimate Image Quality.'
Select the 'Photos' tab (on the bottom), and then change the view to ‘Details.’ Delete any photos with Quality scores LESS THAN (<) 0.5. (NOTE: In the example image provided, no scores were < 0.5).
3) Align photos
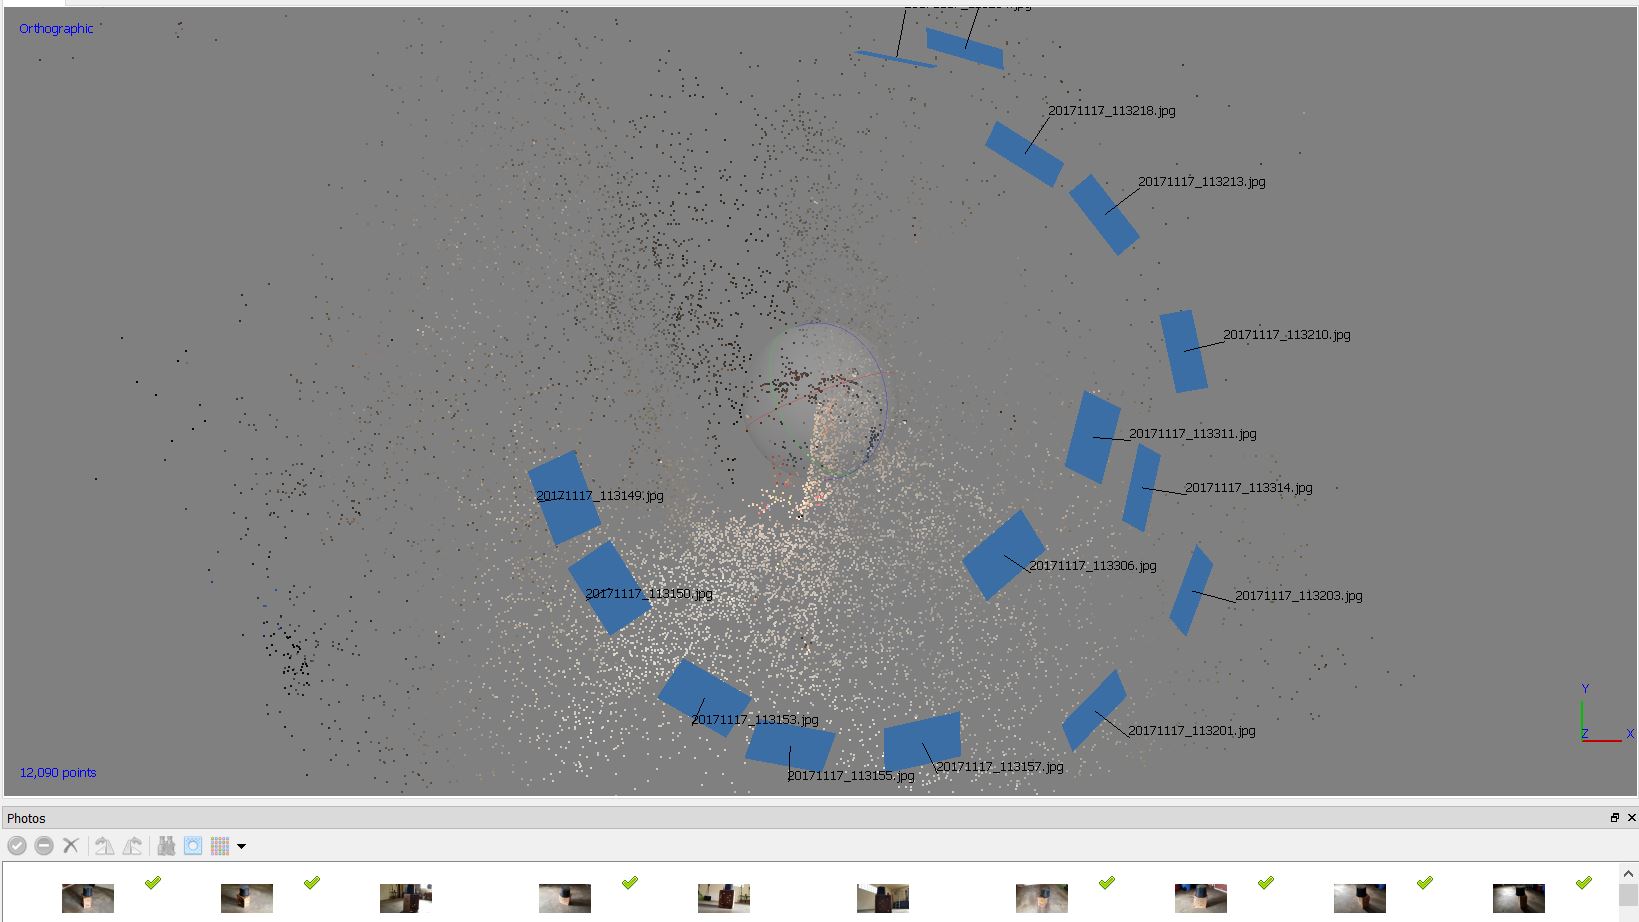
Go ‘Workflow’ >‘Align Photos.' Use ‘High’ (for this tutorial). Highest is better when fine detail is required; low or medium when only coarse detail is needed. Leave all other settings as the default. This can run for a few moments. Next, take a look at your camera positions: ‘Model’ > ‘Show/Hide Items’ and select ‘Show Cameras’. Here you will see the distribution of cameras surrounding your object. Turn off ‘Show Cameras.' Next, look at the images. 'Model' > 'Show/Hide Items' and select 'Show Images'.
Use the ‘Navigation’ icon to freely interact with the data.
NOTE: If you don’t see a point cloud (or maybe you only see a tiny blip of points, try this: “Open Reference pane, select all cameras, right-click on selection and choose Clear [all] option. Then right-click on the chunks' label in the Workspace pane and choose Reset Transform...” (This quote was taken directly from the Agisoft forum). This problem is related to the inaccurate geotags related to the camera positions.
4) Edit resulting sparse point cloud (Reconstruction uncertainty)
Go ‘Model’ > ‘Gradual Selection.’ Select ‘Reconstruction uncertainty’ (use a value of 10). This will select a bunch of (bad) points on the model. Delete all that are selected (hit ‘delete’ or click the x). REPEAT this step, again using a value of 10 (this may capture no new points... which is good).
5) Optimize the camera positions
Select the ‘reference’ tab (lower left of window). 'Tools' > Optimize Cameras...' Select every camera position (all of the check boxes). A couple might be grayed out and un-selectable. Select ‘OK.'
6) Edit resulting sparse point cloud (Projection uncertainty)
Go ‘Model’ > ‘Gradual Selection.' Select ‘Projection accuracy’ (use a value of 10). This will select a bunch of (bad) points on the model. Delete all that are selected (hit ‘delete’ or click the x).
7) Edit resulting sparse point cloud (Reproduction error)
Go ‘Model’ > ‘Gradual Selection.’ Select ‘Reproduction error’ (use a value a little greater than 1). This will select a bunch of (bad) points (if any remain) on the model. Delete all that are selected (hit ‘delete’ or click the x).
8) Manually select and delete points that the 'edit resulting sparse point cloud' tools missed
Use the ‘Model' > 'Free Form Selection' tool and the ‘Navigation’ tool to find and clean up model (delete noise (all points away from your object of interest)).
9) Make sure all points fit inside the bounding box
Select the ‘Resize Region’ icon to be sure all points of the object are contained within. This must be done before generating dense point cloud (any points outside of the box are ignored beyond this step).
10) Generate dense point cloud
Go ‘Workflow’ > ‘Build Dense Cloud’ (I used ‘Ultra high' quality but I have a superfast jellyfish (a Gorillaz reference!) computer). This process can take 10 min. +. Keep in mind that, at any point, points can be edited (deleted). This includes points in the dense point cloud. Next, view the dense point cloud (icon at top for this).
11) Build a mesh
Go ‘Workflow’ > ‘Build Mesh.’ Select ‘Arbitrary’ and trust other defaults (though I selected high).
12) Build a texture
Go ‘Workflow’ > ‘Build Texture’ (select ‘Generic’ or ‘Orthophoto,' use other defaults).
page last edited 4/28/2019